Introduction
Replacing a toilet wax ring might not be the most glamorous task on your DIY checklist, but it’s a crucial one. The wax ring is a simple yet essential component that forms a seal between your toilet and the drainpipe, preventing unpleasant leaks and odours.
Over time, this ring can wear out, compress, or break, allowing water to seep out from under the toilet, which may lead to damaged flooring or even mould growth. If you’ve started noticing a musty smell in your bathroom, water pooling around the base of the toilet, or even a slight wobble when you sit down, your wax ring is probably to blame.
How to replace a toilet wax ring? Thankfully, replacing a toilet wax ring is doable with some patience, a few tools, and this comprehensive guide. Press down firmly to seat the toilet, re-tighten the bolts, and reconnect the water supply. Once everything’s secure and there are no leaks, give it a test flush.
| Step | Action | Details / Tips |
|---|---|---|
| 1 | Turn off water supply | Locate the shut-off valve near the toilet and turn it clockwise to close. |
| 2 | Empty the toilet | Flush the toilet to drain water from the tank and bowl. Use a sponge or towel to soak up any remaining water. |
| 3 | Disconnect water line | Use a wrench to unscrew the supply line from the bottom of the tank. Have a bucket ready for drips. |
| 4 | Remove toilet bolts | Unscrew the bolts at the base of the toilet. Save them if in good condition, or replace if rusty. |
| 5 | Lift the toilet | Carefully rock the toilet side to side and lift it straight up. Place it on a towel or blanket. |
| 6 | Remove old wax ring | Scrape off the old wax with a putty knife. Clean the flange and surrounding area thoroughly. |
| 7 | Inspect flange and replace if needed | Check for cracks or damage. Use a repair kit if necessary. |
| 8 | Install new wax ring | Center the new wax ring on the flange or bottom of the toilet (depends on type). |
| 9 | Reposition toilet | Align the toilet bolts with the holes and gently press down to compress the ring. |
| 10 | Secure toilet | Tighten the bolts evenly, but don’t overtighten to avoid cracking the porcelain. |
| 11 | Reconnect water line | Reattach the supply line and tighten with a wrench—don’t overtighten. |
| 12 | Turn on water & test | Open the valve, let the tank fill, and flush to check for leaks. |
How to Replace a Toilet Wax Ring?
Replacing a toilet wax ring might sound intimidating, but it’s a manageable DIY task with the right tools and a bit of patience. The wax ring sits between the toilet base and the floor flange, creating a watertight seal that prevents leaks and sewer gas from escaping into your bathroom.
To replace it, start by turning off the water supply to the toilet and flushing to empty the tank and bowl. Disconnect the water line, unscrew the bolts that hold the toilet to the floor, and carefully lift the toilet straight up to prevent damaging the seal.
Use a putty knife to scrape off the old wax ring and thoroughly clean the flange area. Then, position a new wax ring either on the flange or on the toilet base, depending on the type and gently lower the toilet back into place, ensuring it is appropriately aligned.
Tools and Materials You’ll Need:
- Adjustable wrench
- Putty knife or scraper
- New wax ring (with or without flange, depending on your flange depth)
- Rubber gloves (a must for hygiene!)
- Old towels or rags
- Sponge and bucket or wet/dry vacuum
- Disinfectant cleaner or spray
- New toilet bolts and plastic bolt caps (optional but ideal)
- Level (to make sure your toilet sits evenly)
- Utility knife (for caulk or packaging)
- Penetrating oil (if old bolts are rusted)
- Hacksaw (optional, for trimming bolts)
- Caulk and caulking gun (optional)
Step 1: Shut Off the Water Supply

Locate the shut-off valve behind the toilet, usually near the floor, and turn it clockwise unti it’s completely closed. Flush the toilet to empty the tank and bowl. Use a sponge and bucket or a wet/dry vac to remove any remaining water. Make sure both the tank and bowl are as dry as possible. This makes handling and moving the toilet far less messy.
Step 2: Disconnect the Water Supply Line
Using your adjustable wrench, disconnect the supply line from the bottom of the toilet tank. Have a towel or bucket ready to catch any remaining water. If the line is old or brittle, consider replacing it with a new flexible braided supply line.
Step 3: Detach and Remove the Toilet
Pop off the decorative bolt caps at the toilet’s base, then use your wrench to unscrew the nuts holding the toilet to the floor. If they’re stuck or rusted, a little penetrating oil can help. In some cases, you might need a hacksaw to cut them off. Gently rock the toilet back and forth to break the wax seal, then lift it straight up and place it on an old towel, cardboard, or trash bag. Be mindful it’s heavy and awkward, so you may want a helping hand.
Step 4: Remove the Old Wax Ring
Grab your putty knife and scrape off the old wax ring from both the floor flange and the horn (outlet) on the underside of the toilet. It’s sticky and messy, so gloves are your best friend here. Discard the wax and thoroughly clean the flange area with disinfectant. Make sure no wax residue remains, as it could compromise the seal with the new ring.
Step 5: Inspect and Prep the Flange and Bolts
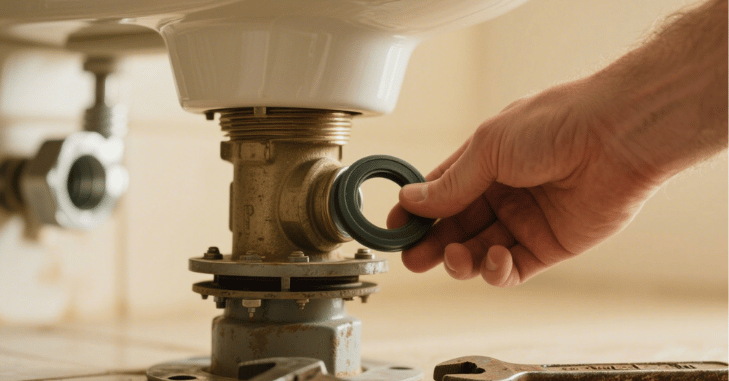
Carefully examine the flange of the circular fitting that connects the toilet to your drainpipe. If it’s cracked or broken, it must be repaired or replaced before continuing. Also, check the toilet mounting bolts. If they’re bent, stripped, or corroded, now’s the time to replace them. New bolts often come with the wax ring kit.
Step 6: Install the New Wax Ring
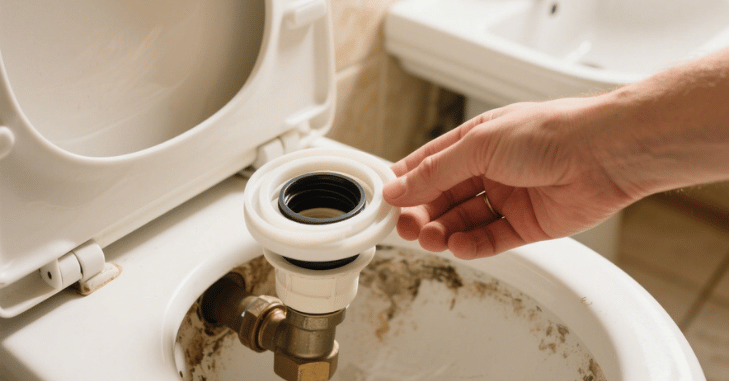
Depending on your preference, place the new wax ring either onto the horn of the toilet or centred on the flange. Be sure it’s perfectly aligned to create a watertight seal.
Some newer wax rings come with a plastic or rubber funnel for added protection, especially helpful if your flange is slightly recessed below the finished floor. Let the wax ring warm up to room temperature before installation to make it easier.
Step 7: Reposition and Lower the Toilet
With everything clean and prepped, lift the toilet and align the bolt holes in the base with the bolts protruding from the flange. Carefully lower the toilet straight down, aiming to press it evenly into the wax ring without shifting side to side. Rocking or rotating the toilet can break the wax seal and cause leaks.
Once it’s seated, apply gentle pressure by sitting on the toilet or pressing down to compress the wax ring and establish the seal. Use a level to confirm the toilet sits flat. If not, you may need shims to stabilise it before tightening the bolts.
Step 8: Secure the Toilet Base
Start tightening the nuts back onto the bolts, alternating sides to apply even pressure. Be careful not to overtighten, as this can crack the porcelain base. Once the toilet feels secure and snug against the floor, use a hacksaw to trim any excess bolt length. Then, snap the plastic caps back into place for a tidy finish.
Step 9: Reconnect the Water Supply and Check for Leaks
Reconnect the water supply line to the fill valve on the toilet tank. Hand-tighten first, then give it a small additional turn with a wrench; there’s no need to overtighten. Turn the shut-off valve counterclockwise to restore water flow.
As the tank refills, check both the base and the supply connection for leaks. Flush the toilet a few times to test that everything is working properly. If it’s all dry, great job, you nailed it!
Step 10: Optional Finishing Touches
If you want to finish things off with a polished look and added stability, run a bead of waterproof bathroom caulk around the base of the toilet. Be sure to leave a small gap at the back so you can spot leaks in the future. Smooth the bead with your finger or a caulking tool for a clean result.
Conclusion
Replacing a toilet wax ring may seem daunting, but it’s a straightforward project when broken down into steps. With a few basic tools, a bit of time, and a willingness to get your hands dirty, you can tackle this DIY repair confidently.
If you encounter unexpected damage, such as a broken flange that cannot be easily repaired or persistent leaks even after replacement, don’t hesitate to call a licensed plumber. Knowing when to do it yourself and when to bring in a pro can save you stress and money in the long run. So next time your bathroom starts smelling funky or your floor feels damp near the toilet, you’ll know exactly what to do!
Apart from that if you want to know about “The Best Drain Unclogger: Solutions to Keep Your Drains Flowing Smoothly” then please visit our “Home Improvement” Category.
FAQs
Use a putty knife or scraper to lift and remove all remnants of the old wax. Clean the area thoroughly before installing the new ring.
No. A rocking toilet can break the seal again. Use toilet shims to stabilise the base and prevent movement.
Yes, a wax ring with a built-in flange can help compensate for height differences and ensure a better seal. Alternatively, you can use extender rings or a wax-free option for uneven surfaces.
You can use a flange repair kit or call a plumber to replace or fix the flange before installing the new wax ring.
Yes, you can replace it yourself! It’s a straightforward DIY project if you’re comfortable lifting and repositioning the toilet. However, if the flange is broken or the leak is severe, it’s best to call a plumber.