
Introduction
Installing a cedar shake roof is a popular, durable option for homeowners who value rustic style and natural insulation. Crafted from split logs, typically western red cedar, cedar shakes have a textured, handcrafted look that suits cottages, modern farmhouses, and upscale homes.
Their visual charm is complemented by their ability to withstand wind, UV rays, and harsh weather conditions when properly installed. Choosing cedar shake roofing is about more than appearance; it shows a commitment to natural materials that age gracefully.
However, the longevity and effectiveness of a cedar roof depend greatly on correct installation. Every aspect, including underlayment, spacing, and nailing methods, is essential. This guide outlines all important steps for cedar shake roof installation, whether you’re building a new roof or improving an existing one.
| Feature | Description |
| Material | Western red cedar |
| Style | Natural, rustic |
| Lifespan | 30–50 years |
| Weight | Medium |
| Underlayment | Required |
| Flashing | Yes |
| Installation Time | 3–5 days (average) |
| Slope Compatibility | Steep-slope roofs |
| Nail Type | Stainless steel |
| Ventilation Needs | High |
| Fire Treatment | Optional (Class B or C) |
| Waterproof Layer | Double felt recommended |
| Maintenance Level | Moderate |
| Appearance Aging | Silvers with time |
| Cost Range | High |
| Required in most regions: Cedar Shake Roof Installation | Required in most regions Cedar Shake Roof Installation |
Cedar Shake Roof Installation
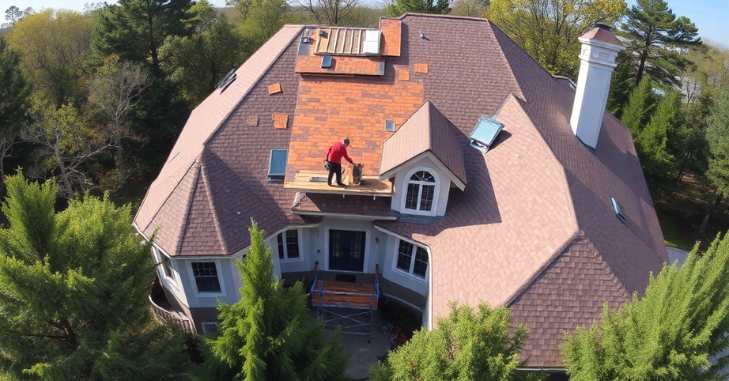
Installing a cedar shake roof involves placing individual shakes in a staggered, overlapping arrangement over a prepared underlayment. Each shake is hand-split, providing a rough, authentic look that complements rustic or traditional architectural styles. This distinctive appearance helps cedar shake roofs stand out compared to synthetic or asphalt options.
To ensure longevity, roofers start by laying a double layer of felt underlayment for extra moisture resistance. Shakes are spaced to enable expansion and secured with corrosion-resistant nails. Ventilation is vital during cedar shake roof installation; inadequate airflow can lead to moisture buildup, shortening the roof’s lifespan. To maintain proper ventilation, special ridge vents and open soffits are commonly installed.
Tools & Materials Needed

- Roofing nails made of stainless steel or copper
- Suggested roofing felt (30 lb recommended)
- Cedar shakes in medium or heavy grade.
- Roofing hammer or nail gun
- Chalk line
- Circular saw
- Ladder and safety harness
Step-by-Step Cedar Shake Roof Installation Guide

Step 1: Prep the Roof Deck
Make sure the plywood or OSB sheathing is dry and clean, removing any debris or damaged decking.
Step 2: Apply Underlayment
Apply a layer of 30-pound felt paper, and in areas with high rainfall, add a double course for extra protection.
Step 3: Install Starter Course
Lay a row of cedar shakes overhanging the eaves by about 1.5 inches. This base row ensures proper water runoff.
Step 4: Begin Shingle Layout
Use a chalk line to draw horizontal lines on the roof, ensuring rows stay straight. Leave a gap of 3/8″ to 5/8″ between each shake to allow for expansion.
Step 5: Nail the Shakes
Insert two stainless steel nails into each shake, positioned roughly 1 inch from the edge and 1 inch above the exposure line.
Step 6: Stagger Courses
Begin the next row offset from the first. Never align joints vertically; this prevents leaks.
Step 7: Flashing
Install step flashing around chimneys, vents, and dormers to prevent moisture intrusion.
Step 8: Ridge Caps
Complete the finish with ridge shakes or custom-cut caps that overlap both sides of the roof. Ensure they are nailed and sealed correctly.
Shake vs Shingle – Know the Difference

While often confused, cedar shakes are split and more textured, while cedar shingles are sawn and smoother. Shakes offer a more rugged appearance and thicker profile, making them better for wind resistance and insulation.
Climate Factors to Consider for Cedar Shake Roofs

Cedar shake roof installation is most effective in areas with moderate to dry climates, where moisture-related decay is limited. In regions with high humidity, untreated cedar might be prone to mold, moss growth, and early aging.
Homeowners should opt for pressure-treated or factory-finished cedar shakes that resist fungi and UV damage. In snowy areas, using steep roof slopes and enhanced underlayment is essential to prevent ice dams. Adequate ventilation is also crucial in hot climates to ensure the wood lasts longer.
Types of Cedar Shake
| Type | Thickness | Ideal Use |
| Medium Split | ½ inch | Residential homes |
| Heavy Split | ¾ inch | High wind zones |
| Tapersawn Shake | Smooth | Contemporary aesthetics |
Best Homes for Cedar Shake Roofs
- Farmhouses featuring steep gables.
- Cottages or lakeside homes
- Luxury rustic retreats
- Recommended treatment: treated shakes for coastal properties.
Installation Mistakes to Avoid
- Aligning shake joints directly
- Using galvanized nails, which tend to rust.
- No spacing for shake expansion
- Skipping flashing
- Inadequate attic ventilation
Fire Safety & Treatment Options

Cedar is inherently flammable, but applying fire-retardant treatments can help treated shakes achieve Class B or Class C fire ratings. For regions prone to fires, check local building codes or think about using pressure-impregnated fire-treated (PIFT) cedar.
Cost Breakdown
| Component | Price Estimate (USD) |
| Cedar Shakes | $400–$700 per square |
| Underlayment | $40–$60 per roll |
| Nails & Fasteners | $50–$80 |
| Labor (Pro Install) | $350–$600 per square |
Maintenance Tips
- Remove debris twice annually.
- Use moss/algae inhibitors
- Replace cracked shakes immediately
- Reseal treated shakes every 5 to 7 years.
Benefits of Cedar Shake Roofing
- Natural insulation qualities
- Excellent wind resistance
- Timeless aesthetic appeal
- Renewable and eco-friendly
- Has a long lifespan if properly maintained.
Conclusion
Cedar shake roof installation boosts visual appeal and offers a durable, natural, and eco-friendly option for homes. When correctly installed, it acts as an effective barrier against rain, wind, and heat, while maintaining a timeless, classic look.
Installing a cedar shake roof is a top choice for homeowners seeking both charm and durability. When properly installed, with high-quality materials and regular maintenance, it can offer decades of protection and visual appeal to any home.
Apart from that, if you want to know more about How to Spray Paint Metal? Your Comprehensive Guide to Spray Painting Mastery then visit our Home Improvement category.
FAQs
No, they are resistant to moisture but need underlayment and correct spacing to guarantee complete waterproofing.
With proper installation and maintenance, it can last 30 to 50 years.
Yes, especially in humid or wildfire-prone areas. It is recommended to use pressure-treated shakes.
Cedar shake roof installation should start on a clean, solid deck to ensure proper nailing, ventilation, and moisture management. Installing over old shingles can trap moisture and shorten the roof’s lifespan.

